
What Is An Animation Storyboard?
What is an animation storyboard?
It’s always best to start from the beginning. A storyboard is merely a series of drawings intended to pre-conceive the potential shots of a video. It is essential for the creator or director to envision the end product and how the movie will look and feel.
What does a storyboard look like?
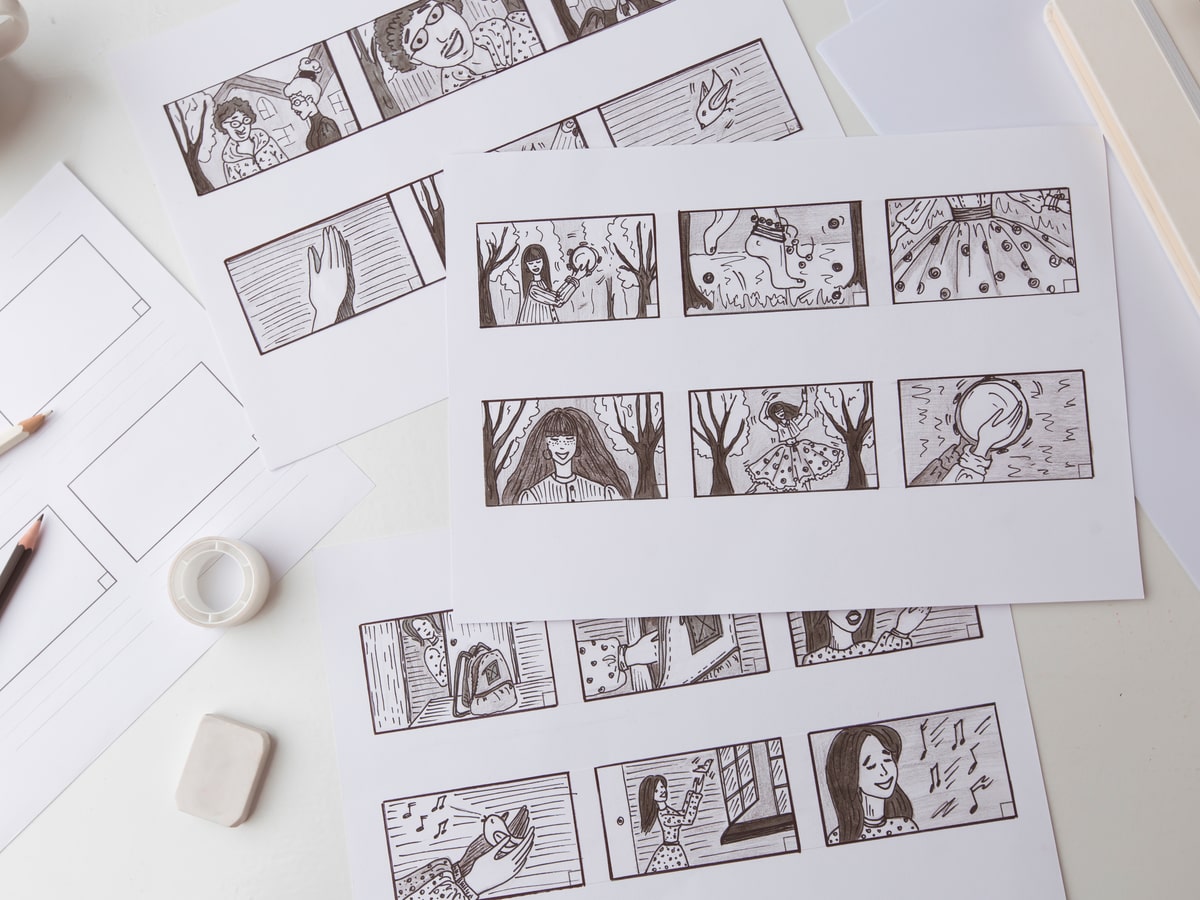
Different organizations will approach storyboarding in a variety of ways. Some may develop them in great detail through the use of color and enhanced drawings, while others may prefer simple outlines in greyscale.
How to produce an animation storyboard
If you have read any more of our recent blog entries, you will know just how important the story is to us at Animation Explainers. It is simply the foundational element of any project!
And storyboards’ biggest role? To convey the story adequately, as close as possible to how the producer hopes the video will look once completed. Accuracy at this stage is key since it will save you a lot of time later in the production process.
Storyboard do’s & don’ts
It can be far easier than you think to make a drastic error in the storyboard process. These should be avoided at all costs since any mistakes made at this stage can be difficult to rectify later.
1. Every single scene cut MUST accomplish some goal
When crafting your storyboard, avoid cutting to another scene unless there is sufficient reason to do so. This is so that we do not confuse the viewer.
Cutting functions to shift the focus of the audience so that they direct their attention to critical aspects of the story. For example, if a character is drinking a glass of water and then gestures to place it on the table, this movement is probably not prominent enough to warrant a close-up. However, if part of the scene is that the character has just consumed the poison that was on the rim of the glass, it is crucial that the audience see this clear as day.
2. Do not move the camera unless necessary
Dizzy viewers? Not ideal.
This may not apply so easily to animated video storyboards, but even still, the perspective in these should remain as unchanged as possible to avoid any disorientation. In connection with the last point made, even camera movements should serve to have a purpose – to establish the beginning of a sequence or emphasize a character’s important line. Otherwise, try to remain still and consistent.
While 2D animation’s flat dimensions mean that it is merely natural to maintain a single perspective, it can be much easier to fall into the over-movement trap when it comes to 3D animation. In much 3D animation, camera angles change throughout, revolving around the action to showcase each illustrative aspect.
Instead, it is better to show any background work in an establishing shot. Afterward, it should be merely treated as an accompaniment. The last thing you want to do is deter the audience’s attention from the scene’s main action.
3. Monitor your composition
Make the most of any negative space. If your storyline’s primary focus is on a character, make sure they fit the frame. For example, don’t draw a tiny character in your frame and nothing but background around him. It may be the case that this is for a solid purpose, such as showing how alone the character is. Otherwise, you’re at risk of losing your audience through poor animation and neglect of interest.
Try your best to incorporate depth into your shots. This can be achieved by using foreground elements and framing your scenes so that they are not shot directly on the character. Animators have seldom included straight-on views of characters since it is more often than not an unsettling perspective.
It’s still a good idea to dabble in other shot angles, however. For example, an over-the-shoulder shot of a character speaking with another is a compelling perspective to add to the mix. This over-the-shoulder (OTS) shot illustrates a level of identification an audience has with a character and is often used to portray a dynamic relationship between two characters. It can also help fill any negative space within the scene.
4. Keep track of your axis
In an animation storyboard scene, there should always be an imaginary line in place, known as the axis. This is the line that your camera can never jump across. Consider two characters speaking to one another: a straight line can be drawn through the centers of these characters, and your camera angle must not cross it. If you can’t avoid it, make sure to cut first by placing your camera on the axis. That way, you can then you can cut to the other side.
5. Avoid difficult angles
For simple explainer videos, extreme high-shots and low-shots are probably unnecessary. They can make your scene needlessly complex to animate following the storyboard phase. Of course, a fast-paced 3D action scene is a totally different story. It all depends on your chosen animation style.
6. Have clear animation instructions
There is a good chance that your work will involve other people, so you want to make sure that every individual working on the project can understand as much as possible what it is that you are getting across on your animation storyboard.
You should do everything you can to help the animators access your inner vision: that way, the end product will be as close to your initial perception as possible, and everybody wins!
That being said, it’s a good idea to write captions under the drawings explaining each phase and include directional arrows to show camera movements.
7. Avoid continuity errors
Remember in that episode of FRIENDS, where Ross reveals he doesn’t like ice cream, and the following season we see indulging in every last bit of a vanilla swirl on a date in the city? While it often only takes true fans of series’ to spot errors like this, in a short explainer video, they will be far more apparent to the human eye.
In fact, continuity is often a problem in storyboards. Throughout a sequence, you should keep everything constant. Otherwise, your efforts will look poor and will have been in vain. Characters must consistently be in the correct positions from scene to scene. For this reason, you need to always keep track of where they move to. Props must also be accounted for, with the sizes of characters and objects in the background following closely.
3D animation has reduced this dilemma, as the same set and layout are used for the entire sequence. Luckily, if a single element is not working perfectly in the storyboard that affects continuity, it is usually caught early and flagged immediately for amends.
However, in 2D, more often than not, the layout artists/animators are more inclined to mirror the storyboard. Drawing precisely what they see, whether it is exact or not. If you have a remote office and subsequent team members working all over the world, it can be far too easy for things to get lost in translation.
For that reason, you must ensure that your storyboard is exactly on the mark to avoid any hassle further down the line.
8. Get creative with character poses
Taking shortcuts when it comes to storyboarding can be tempting, but this should be wholly avoided. Fill the frames with varying character poses. We discuss walking animation in another blog, where we look at different stages of posing.
You can’t really go wrong if you ensure sure to have a start pose and a final pose. That way, you can fill in the middle gap afterward.
It can help to physically act your scene out and incorporate any movements you envision for your character in another frame.
Once you have the first frame drawn and the composition worked out, additional frames are far easier to include, so include as many as you can. Adding more poses later can be accomplished by putting small thumbnails into the action area of your storyboard. For clarity, we advise labeling them numerically and indicating in the dialogue with those numbers to match where each pose is intended to go.
9. Important poses must be central
This may seem obvious, but you need to be sure to keep in mind that significant action should happen in the center of the frame. To help with this step, it can be beneficial to envision a safe frame inside your storyboard frame so that you don’t draw any important activities outside of it.
Wrapping Up
A key point that we have continued to discuss throughout this blog is that every shot, angle, and animation decision within the animation storyboard phase must be purposeful.